For a summer 2021 exhibition at the MFA, two artists have created a “Garden for Boston” outside the Museum’s main entrance. An installation by Elizabeth James-Perry (Aquinnah Wampanoag, b. 1973) uses the traditional Woodlands method of planting corn, beans, and sedges in a horseshoe-shaped mound. James-Perry’s work is a reminder of the strong and long-lasting Indigenous presence here in New England.
The other beautiful installation was envisioned by illustrator and collage artist Euka Holmes (African American, b. 1955), who planted lots of sunflowers as a continuation of the artist’s Roxbury Sunflower Project, which, now in its fourth year, represents resilience and evolution.
Planting a seed is the first step to creating a garden and growing new life. Using your MFA art kit or materials from home, paint an image on a plant pot that represents new life. Then plant your seeds and enjoy watching them grow!
Instructions
Materials
You will need:
a small clay or terracotta plant pot
acrylic paint
a paintbrush
a palette paper or wax paper
two small cups of water
paper towels
a pencil
peat seed starter pellet cake or potting soil
flower seeds
Step 1
Gather all your materials and spend some time thinking about an image that represents new life to you.
Step 2
Place your peat seed starter cake in a small cup of water. Let it sit overnight before you put it inside your plant pot or add seeds. It will be ready to use once it has doubled in size. If you are using potting soil, skip this step.
Step 3
Once you’ve decided on what you want to paint on your pot, open your paints and begin! You can also start without an idea and see where your inspiration leads you. Remember to get a cup of water and some paper towels so you can keep your brush clean.
Step 4
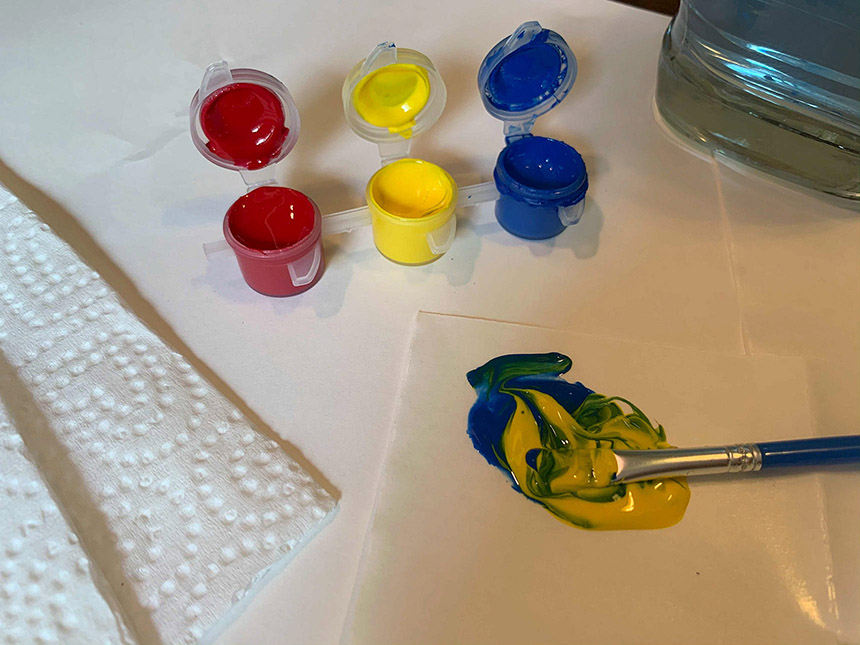
If you have paint from the MFA art kit, you have the primary colors red, yellow, and blue. You can mix these colors to make many other colors. Use the shiny side of your palette paper or a piece of wax paper to experiment. Here we’re mixing blue and yellow together to make green.
Step 5
Paint a base layer of color all over the outside and inside of the plant pot then let it dry. This will be the background for your design.
Step 6
Once the base layer is dry, add some painted designs and details to your pot.
Step 7
Enjoy the process of painting. Let each layer of paint dry before adding more colors, designs, and details to the outside of your pot. When you are done painting, wait until your plant pot is completely dry before planting your flower seeds.
Step 8
If you’re using a peat seed starter cake, after it sits overnight and doubles in size, place it in your painted plant pot. If you’re using potting soil, fill your plant pot almost up to the top rim. Then press a couple seeds into the top of the soil, making sure they are about a half-inch deep and covered with soil. Don’t forget to add a little water!
Step 9
Place your pot near a widow that gets plenty of sun and add water to the pot when the soil gets dry. In about 7 to 14 days your seeds will sprout new life. When the seedlings have 3–4 leaves on each stem they are strong enough to plant outside. If you’re not planting sunflowers you can also leave them in the pot, but keep them in the sunny spot and keep watering them.