Basket, Native American (Pomo), before 1916. Willow rods, carex roots, and cercis splints. Gift of George F. Meacham.
Basket, Native American (Pomo), before 1916. Willow rods, carex roots, and cercis splints. Gift of George F. Meacham.
Learn how to weave a basket with your MFA art kit or materials from home
Baskets are made by weaving, or sewing, fibers and other bendable materials together. Plants, fabric, yarn, and string can all be used for weaving. The basket above, made by the Indigenous Pomo people from Northern California, is over 100 years old! Willow tree rods were used for the warp, the top to bottom pieces, and roots from the carex plant, a type of grass, were used for the weft, the pieces woven over, under, and across the willow rods. Splints made out of cercis, or redbud tree, were added in places where extra support was needed.
If you have an MFA art kit for this very activity, you already have all the materials you need! If not, start by gathering all the materials below.
Download and print the Basket Template and use your scissors to carefully cut around the outside of the large circle.
Step 2
Cut out each of the black triangular spaces marked on the template. Do not cut the smaller circle in the center—this is the bottom of your basket.
Step 3
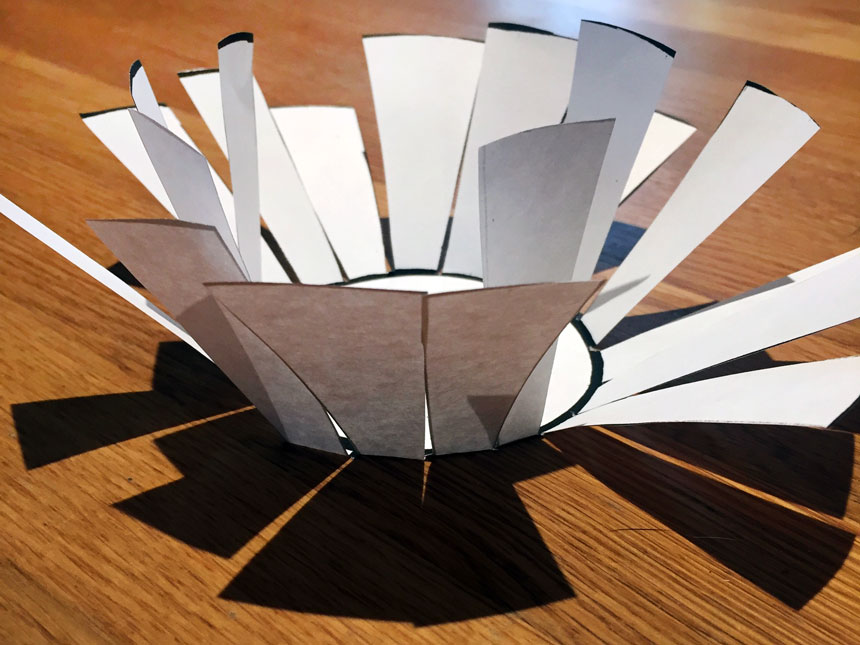
Bend the strips you created up. You can start to see a bowl shape!
Step 4
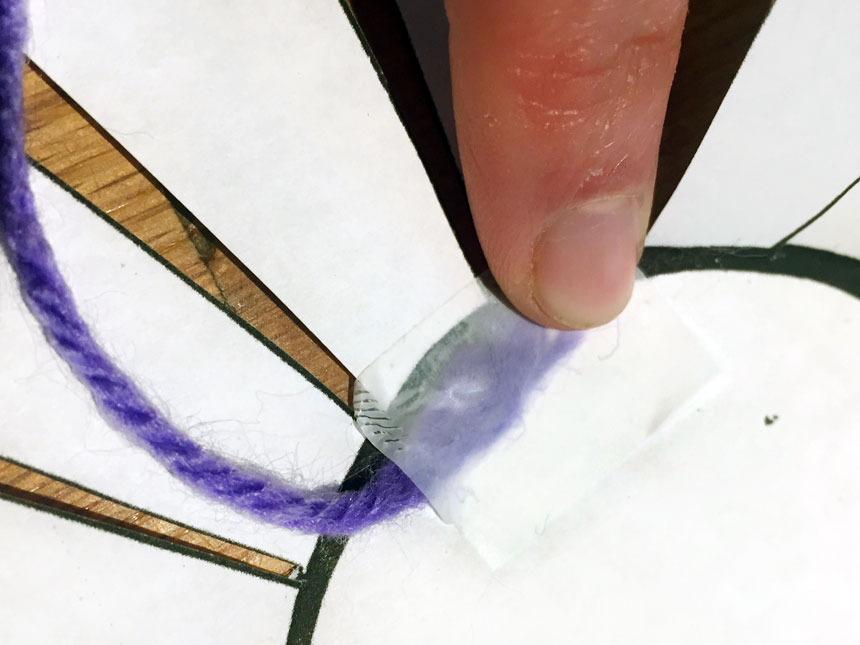
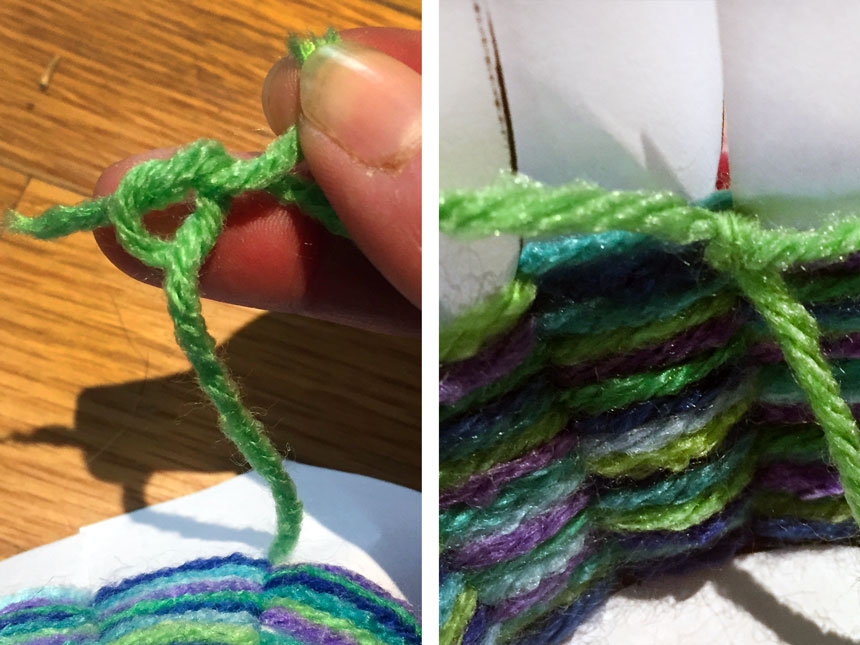
Use clear tape to attach one end of a piece of yarn or raffia to the inside bottom of the basket, on top of the black line.
Step 5
Holding the paper so you’re looking at the outside of the basket, pull the yarn from the inside to the outside. Then weave it around the first strip of paper and behind the next one.
Step 6
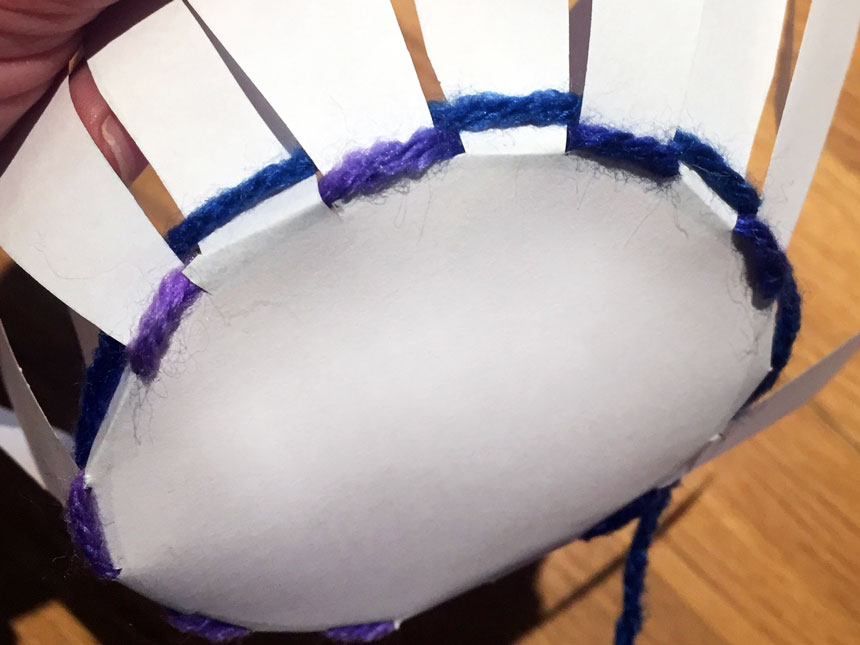
Keep weaving around the front of one strip of paper and behind the next, until you get back to where you started. Then weave around the basket strips a second time.
Step 7
Keep weaving until you have a few rows of yarn. Gently push the rows down toward the bottom of your basket with your finger to keep your stitches close together. We used multicolored yarn to make it easier to see the stitches and layers. Since the paper is fragile, be careful not to pull too hard when you weave. If you make a mistake, unwrap the yarn as much as you need to and start again.
Step 8
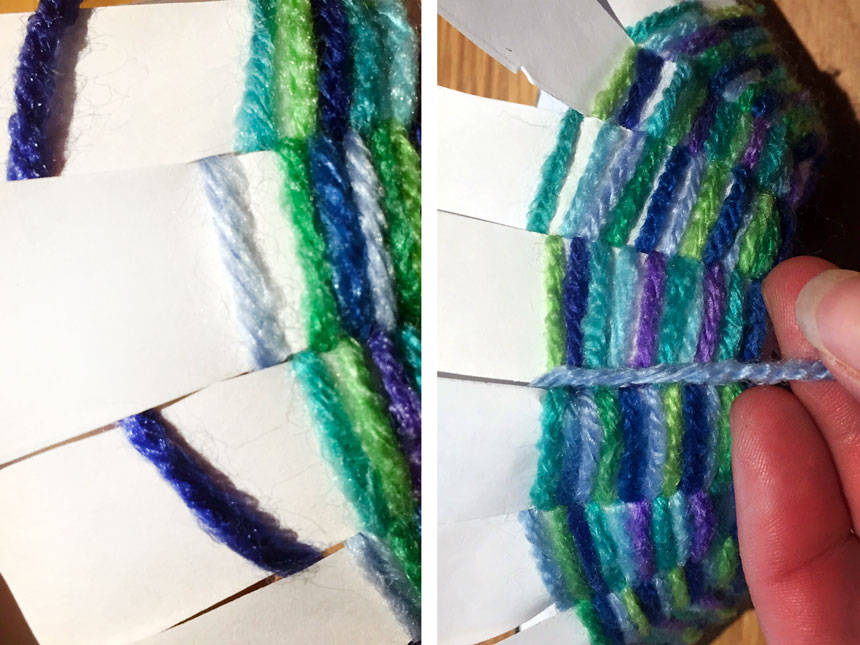
Keep going around in a circle, weaving the yarn around one strip of paper and behind the next. When you look at the stitches from the front you will see string, a blank space, and then more yarn. Gently pulling the yarn straight down from the front or back as you weave around the paper helps keep everything together, too.
Step 9
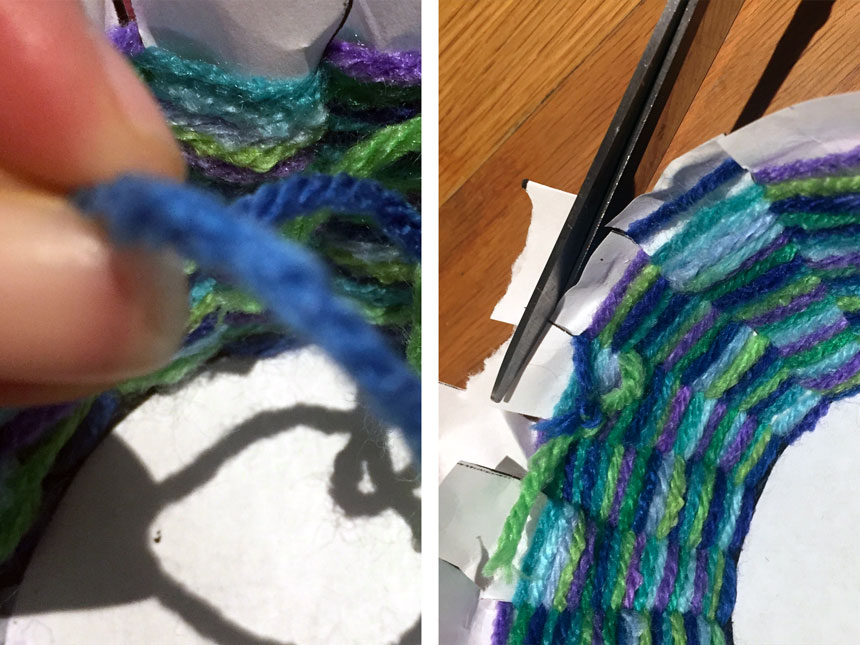
If you start to run out of yarn, tie a new piece onto the old one. Keep the knot on the inside of the basket so you can’t see it from the outside.
Step 10
When you get close to the top of the paper, tie the yarn you are using to one of the woven pieces, and cut off the end. Use scissors to trim the top of the paper to make all of the strips the same length, being careful to not cut the yarn.
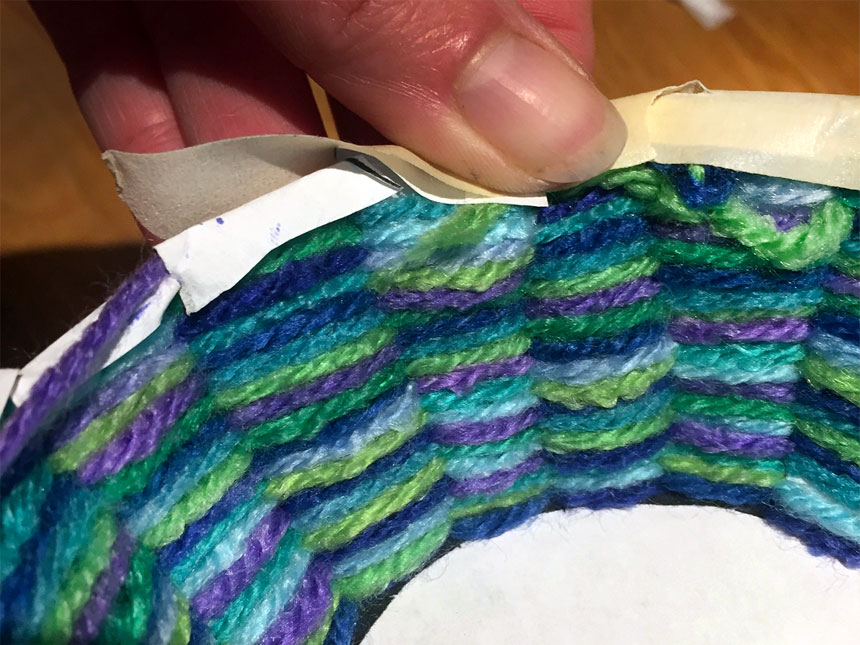
Step 11
Fold the edges of the paper over into the middle of the bowl. Starting from the outside, place a small piece of tape along the front edge of the bowl. Fold it over to cover the paper and secure the yarn.
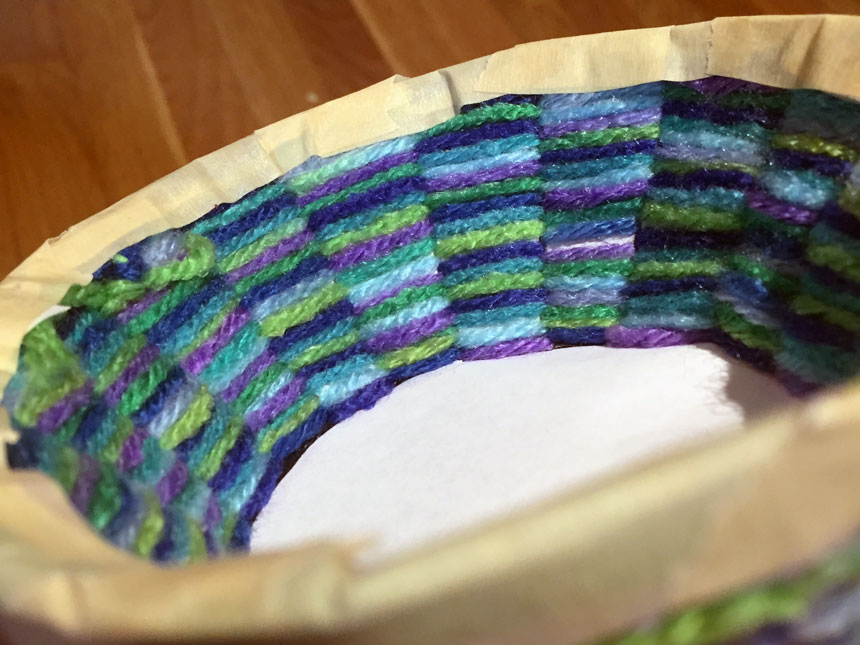
Step 12
Continue using small pieces of tape to finish the top of your bowl. Take your time and line up the strips of tape so that you have straight edges. What other types of baskets can you make?